
Walmart gave me this art. Well, not exactly but kind of. I wanted to do an art piece using cut up paint chips and while I was in Walmart, I decided that I was going to attack. I headed to the paint isle and was trying to nonchalantly browse a few colors and grab as many as I needed. I seriously felt like I was going to hear a CODE RED alert over the intercom at any second. I would take a few, fumble in my purse, add them to the stash and then do it all over again. I know they are free, I just felt like I was violating some painter's code and was paranoid that security was going to cart me off to a dark little room in the back and confiscate my paint chips. Luckily, I made it out of there without any incident and was on my way to creating my new art.
I had a simple black 11x14 frame tucked away in my stash, half a piece of left over foam core board from my little guys school project and my stash in my purse.
I drew out the shape of the frame on the foam core board using the glass as a guide and then drew another box on the inside to use as my guide for placing them.

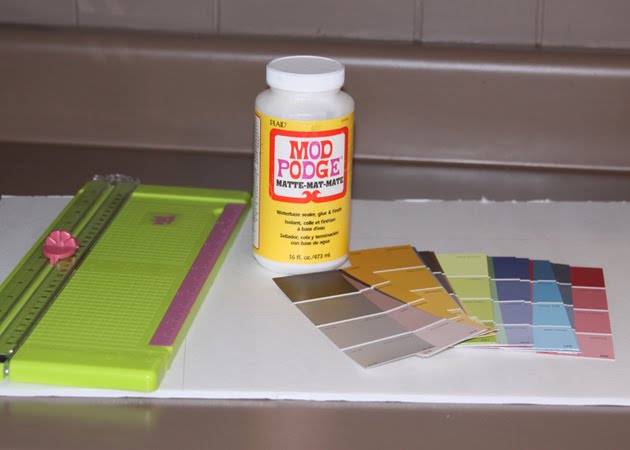
Then I began cutting up the paint chips into small pieces from about 1/4" to 1/2". I didn't measure them, I just started cutting them randomly with my paper cutter.
After I got all eleventy-billion pieces cut, I started on the first row, starting at the bottom and Mod Podged it down. I moved up the row overlapping them similar to shingles on a roof making sure to keep the left and right sides aligned. After I finished the first row I moved onto the 2nd row until my box was filled.

After they were all down, I put a layer of Mod Podge all over the top to seal the deal.


After it had dried, I used an Xacto knife to cut out the foam core to the size of my frame and finished it up.


I think it looks great against the brown walls but its looking a little bare still. I may try to find 3 matching frames and make 3 and hang them vertically on the wall just to give it a little more oomph. On second thought, I'm still a little bit afraid to go back to Walmart's paint section so this one just might have to do.


That is so cool! Love how it looks. Have you seen David Bromstad's wall behind his sofa in last season's Color Splash? This reminds me of that wall. Very artsy, thanks for sharing.
ReplyDeleteBrittany
http://www.prettyhandygirl.com
Oh my gosh! I am seriously IN LOVE. With this idea! I am a lover of colors-can never pick or choose one particular one and this is such a great way to display all the ones that i love or am drawn to. I am going to have to copy you on this one. LOVE IT!
ReplyDeleteThat's a good idea to do with all the many paint chips I have collected through the years. Maybe I'll try it with the paint colors I've used in my homes.
ReplyDeleteI like how this turned out!
ReplyDeleteThat is fabulous! Great idea.
ReplyDeleteFirst of all, LOVE your blog name! Secondly you are incredibly talented and last, thanks for linking up w/ MFM!
ReplyDeleteLove it. I LOVE IT! I want to do one now, but I have 15 current unfinished projects. But I so totally want to do one now.
ReplyDeleteOh, I like! Something to do with all the color card rejects. :)
ReplyDeleteLove this idea! Very graphic statement.
ReplyDeleteGreat art work and I love your use of Mod Podge for this project!
ReplyDeleteHow funny! I love the art work. What if you stop at Lowes and then Home Depot for the next two frames? I think 3 would look lovely in your hallway. :) I feel the same way about taking paint chips.... Thanks for following me! That made my day!
ReplyDeleteWhat fun! I have always had a soft spot in my heart for paint chip art projects.
ReplyDeleteMy suggestion for your the other frames - spread out a bit. You can go to KMart, Sears, Lowes, Home Depot and Ace Hardware LOL I went to Sherwin Williams fairly recently and they gave me an entire paint deck for free. It was like heaven!
Kristin _ The Goat
Such a fun and fabulous idea!! You go girl! :D I am happy to be your newest follower of your adorable blog! I'd love to have you as a friend at Frou Frou Decor! I would also like to invite you to link up at my weekly Fabulous Finds party..every Friday - Sunday! Hope to see you there!
ReplyDeleteHugs,
~Terrell @ Frou Frou Decor~
I love how this turned out! There is something about walmart that makes you feel guily even when you shouldnt...I use the automotive checkout and almost chicken out everytime. Partying w/ you from CSI
ReplyDeletelove your guts
mandi
I love using paint chips! This really turned out nice!
ReplyDeleteThis is a great idea! The colors that you chose are perfect.
ReplyDeleteWhat a brilliant idea!! It turned out SO great. Way to go!
ReplyDeleteI love paint chip art. I have a total soft spot for it! Thanks for linking up to the Mad Skills party!
ReplyDeleteThis was one of my favorite projects at last week's Mad Skills party, so I will be featuring it tomorrow morning!
ReplyDeletemadincrafts.blogspot.com
Okay, that is so cool! It looks great!
ReplyDeleteI used to be afraid to take "too many" paint chips too, until I was with my sister one time and she pretty much took one of every color and nobody seemed to care. Now I take as many as I want!
Hello
ReplyDeleteThank you for finding my Dulux colour charts, I love all the other ideas made with this wonderful resource.
They are a great colour tonic.